I’ve been eyeing those adorbs little fabric pumpkins decorations. Cute and festive. I thought “hey, come on kid, instead of buying one, let’s try and make one.” Grab your sewing kit, les do this. Easy cheesy pumpkin squeezy!
You’ll need //
- Fabric (7×14)
- (Fabric) Scissors
- Needle /Thread
- Pen or Fabric marker
- Fluff (or crumbled paper or torn pieces of fabric)*
- Embroidery Floss
- Felt
- Glue gun (optional)
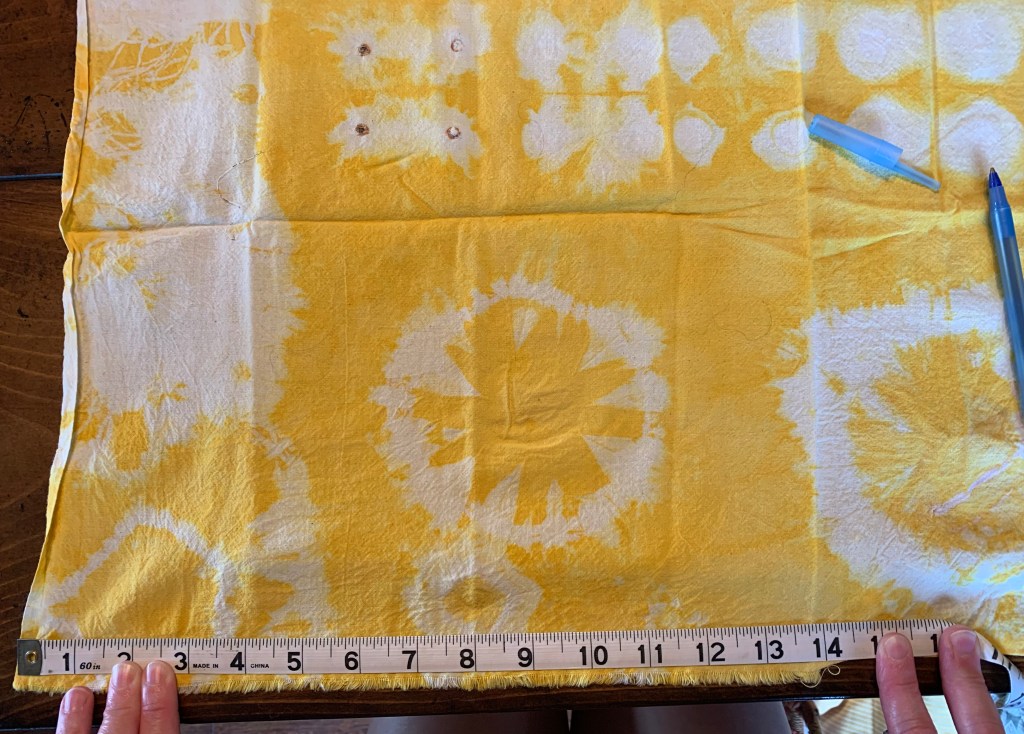
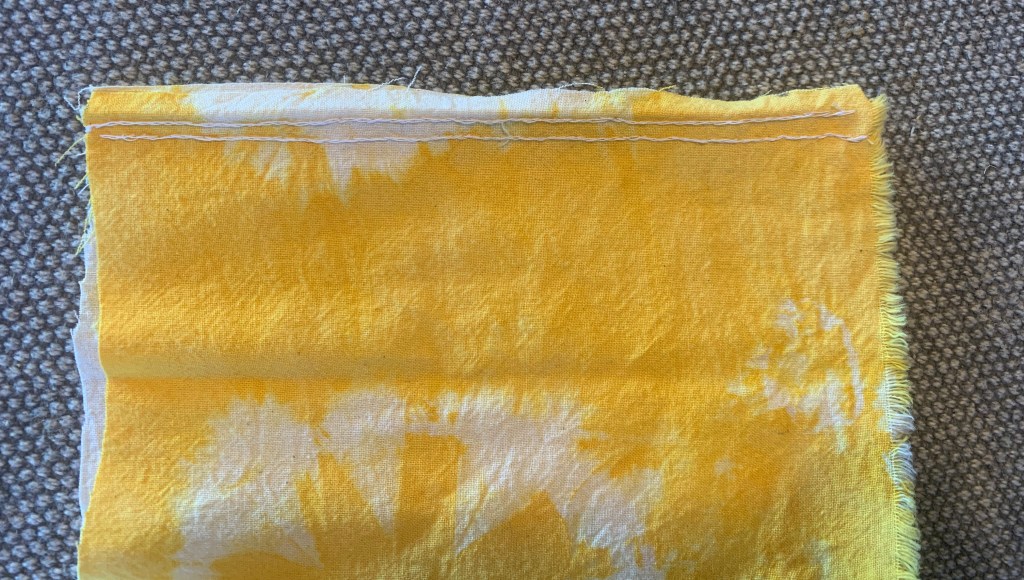
First I dug around in my fabric basket. You know that random basket full of pieces of fabric you’ve collected over the years for future projects. haha, no. I realize that is not normal. So, I found this rad piece of yellow fabric that I made back in my screen printing class a million years ago. We were learning different dyeing techniques. This cute little yellow one is shibori technique. I didn’t know it at the time but it was destined to be a pumpkin, lucky duck.

Measure out 7 x 14. I couldn’t find my fabric marker so I used a pen to mark my measurements. Ehh, I’ll make the marked side the inside and no one will be able to see it. And then cut cut cut.

Now you’ll have your rectangle of fabric. Didn’t do a perfectly straight cut think I saw a squirrel and got distracted. It won’t really matter yours isn’t perfectly straight like mine. You’ll be gathering in that fabric and it won’t be seen.
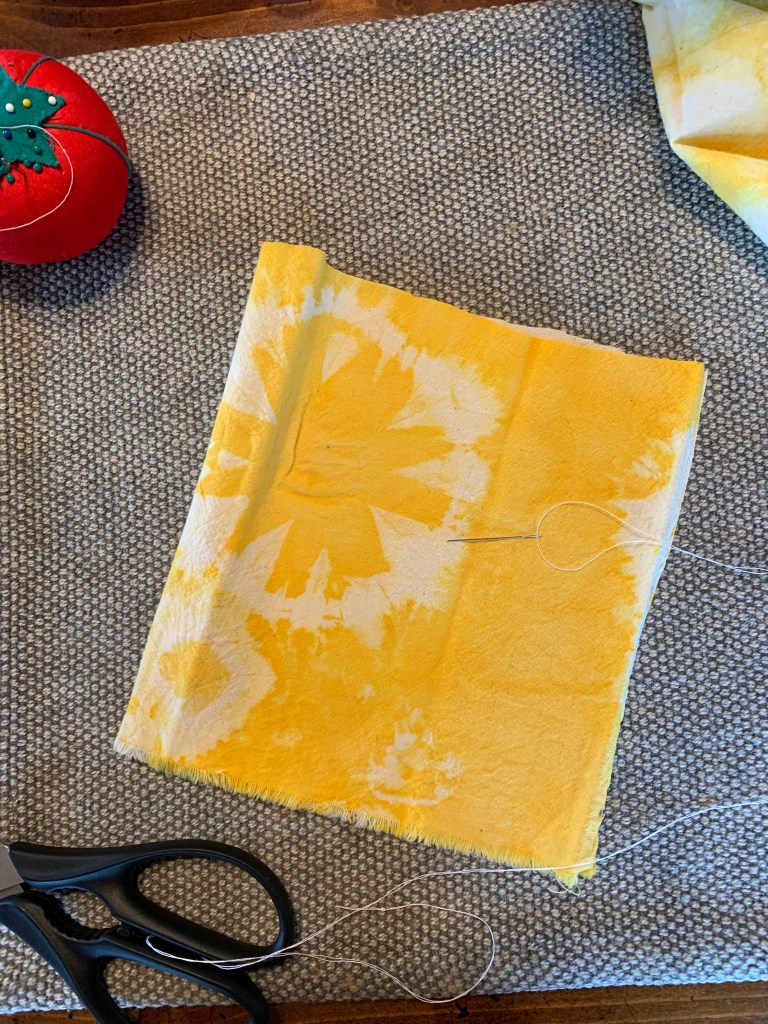
Fold the fabric inside out, so whatever side of the fabric you want to show on the pumpkin have that folded in. Now sew about 1/2 inch on the side of the fabric where the 2 pieces meet.
Like above…continue until the whole side is sewn up. You can also do this on the sewing machine. Mine was out of commission at the moment so I worked through it by hand.
At the time I thought I needed an extra row stitched to hold it all together, however, it is totally not necessary. Feel free to skip that step to save yourself some time. I did the troubleshooting for ya. You’re welcome 🙂

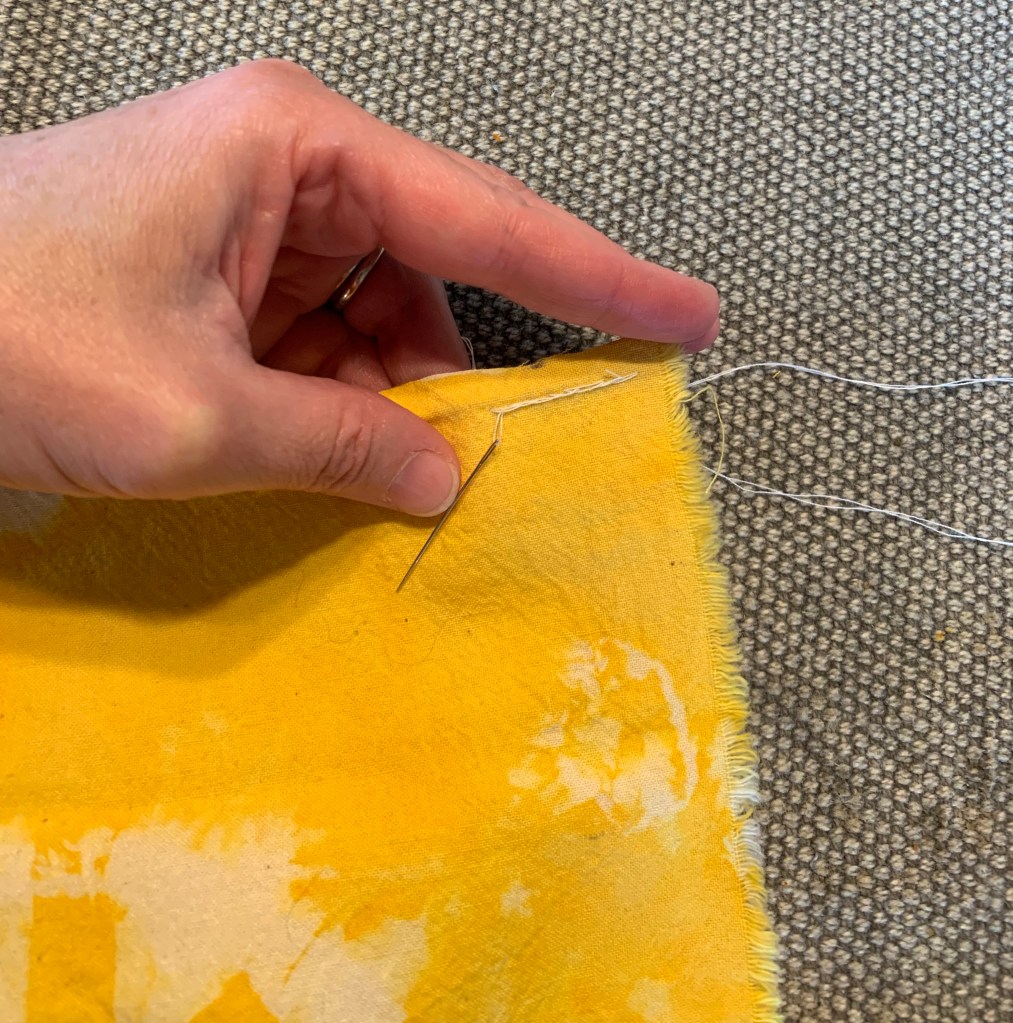
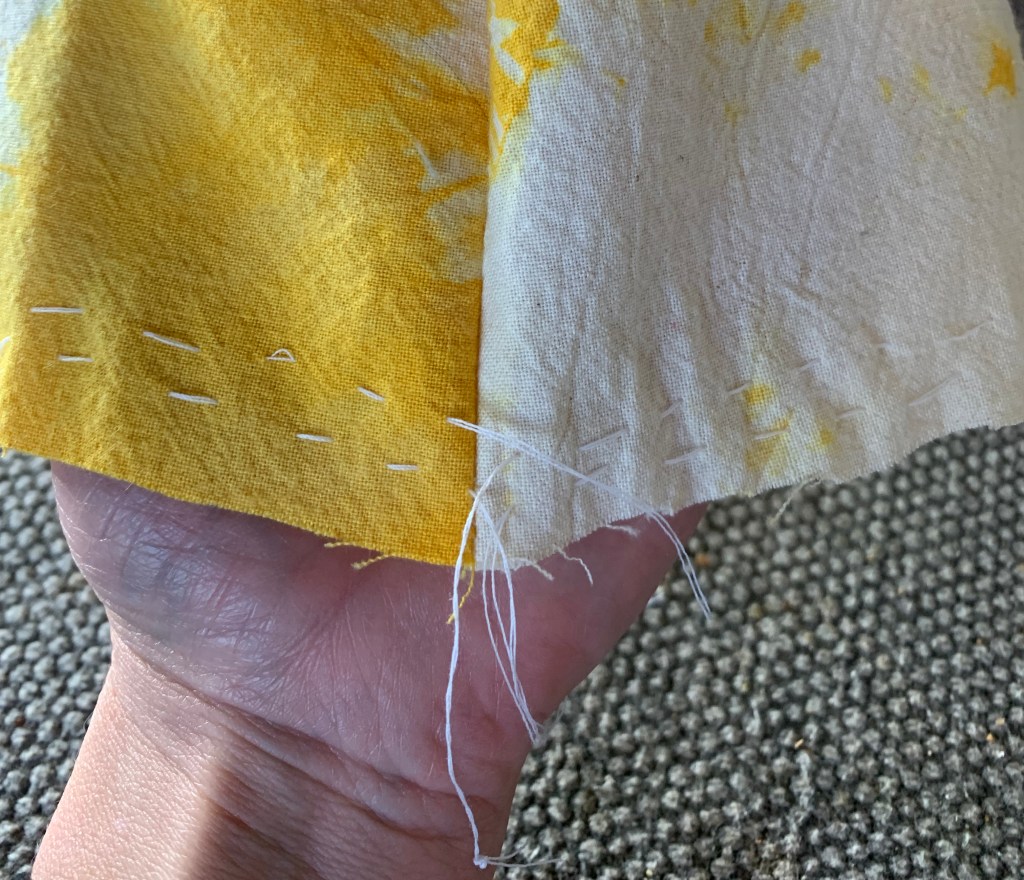
Next with the fabric still inside out sew a gathering stitch on one end. I found that stitching one side that starts next to the sewn edge and ending on the other side of the sewn edge works best. I did not do that the first time, do not do as I did. It will still work but I recommend the other way.

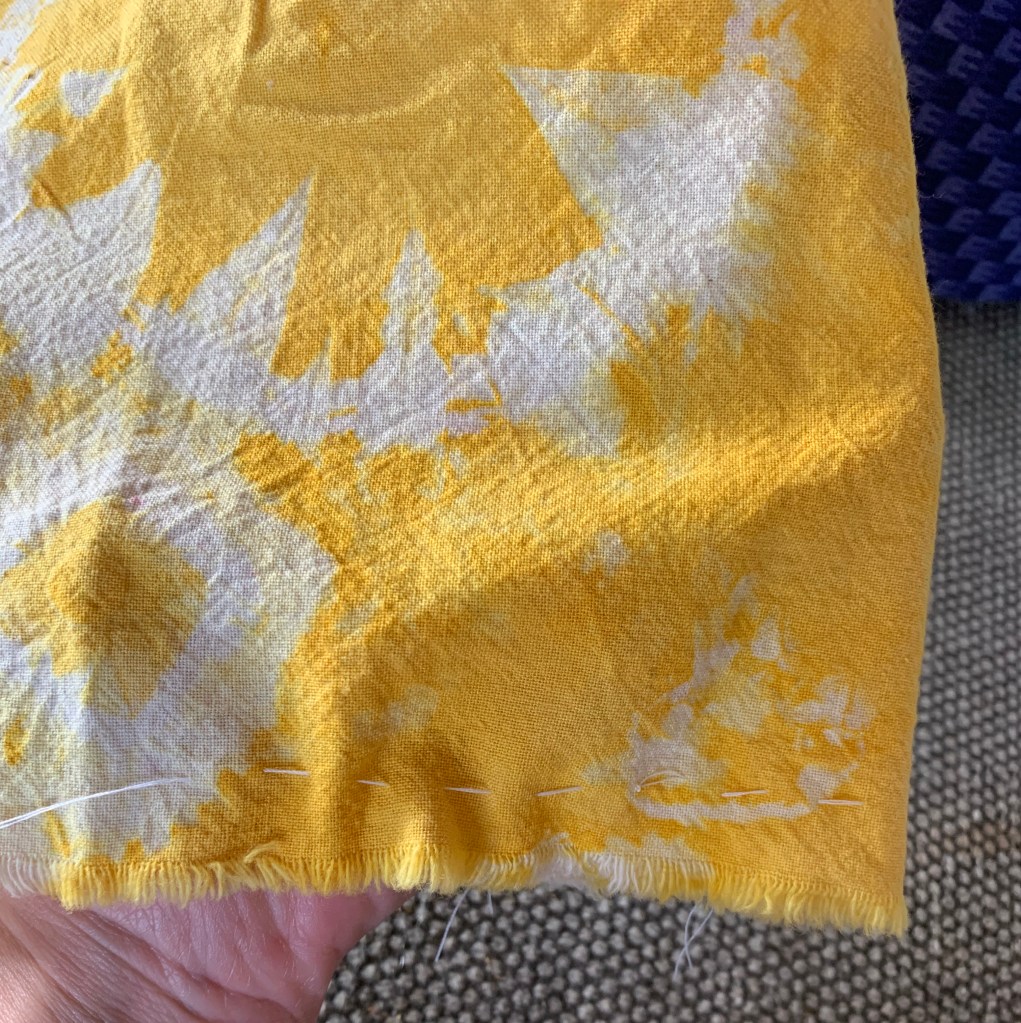
I tried to keep my stitching as straight as possible but ya know, things happen. Still worked out, the fabric will be gathered and you won’t be able to see it. Stitch a second gathering stitch, I think this 2nd row is needed to keep the top and bottom tight. You can see better in the picture below how I did not start and stop around the other seam. No, no, no.
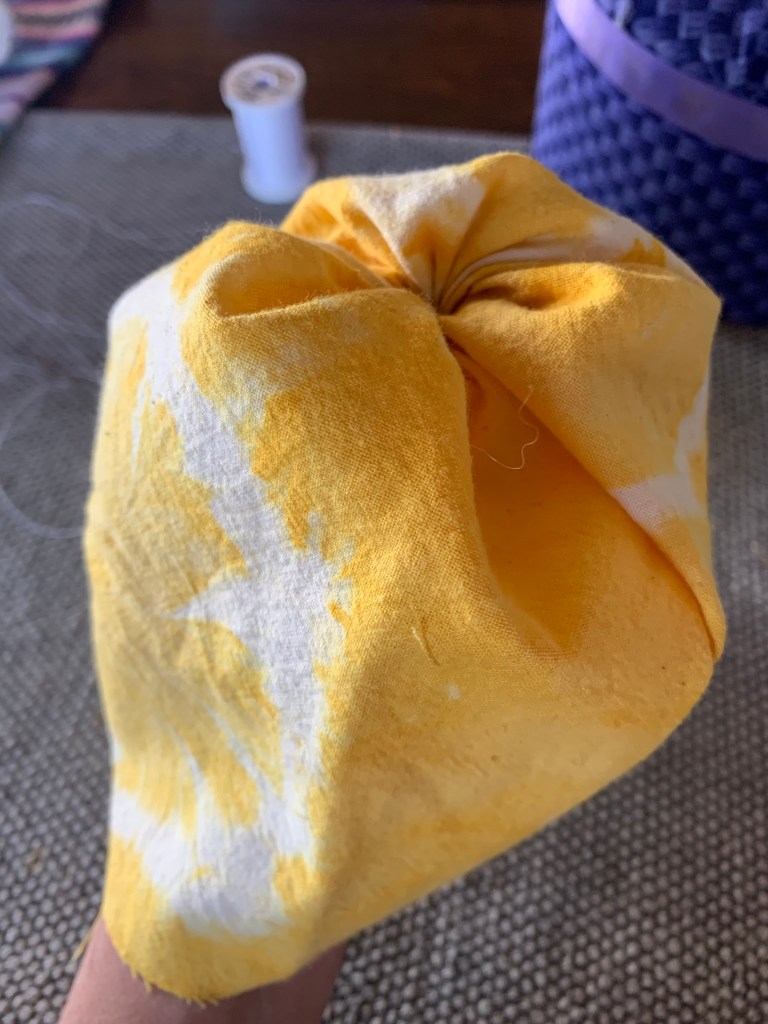
Then pull 2 strings on one side to gather in the fabric. Make sure not to pull too hard, you really don’t want to break your thread here.

Once the fabric is tightly gathered sew through the fabric to keep it tight and secure.

Now turn this little pumpkin in the making inside out. Getting closer, starting to take shape.
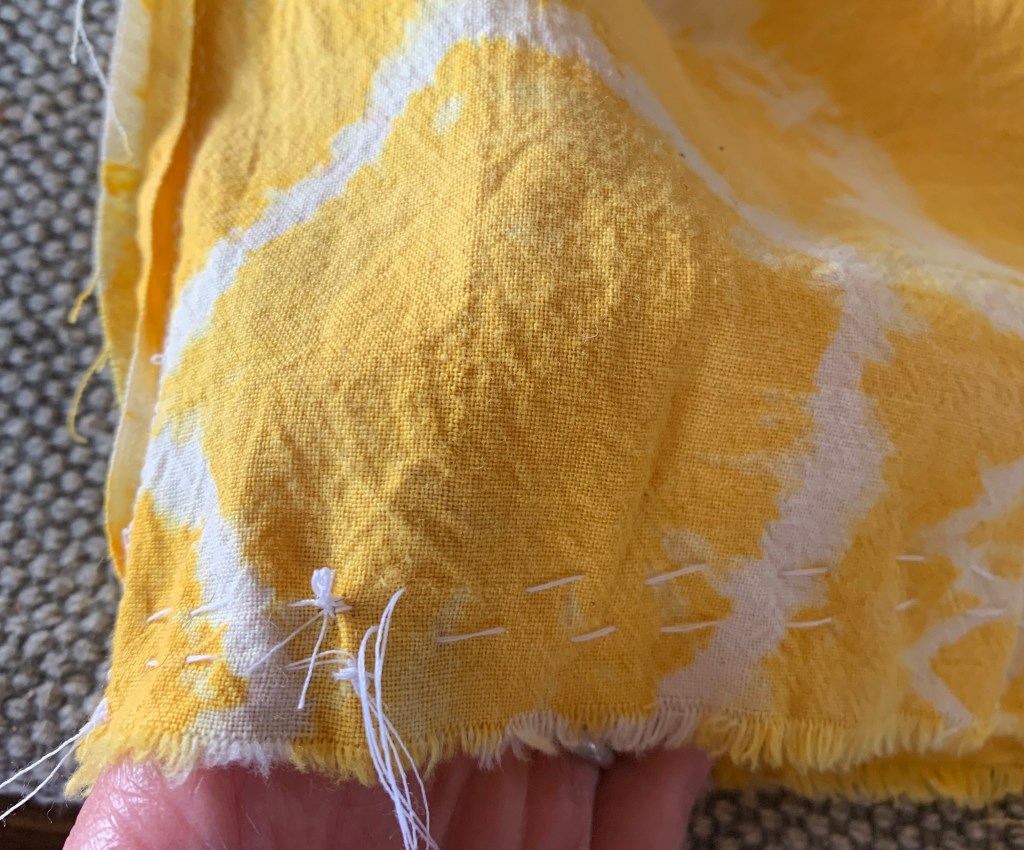
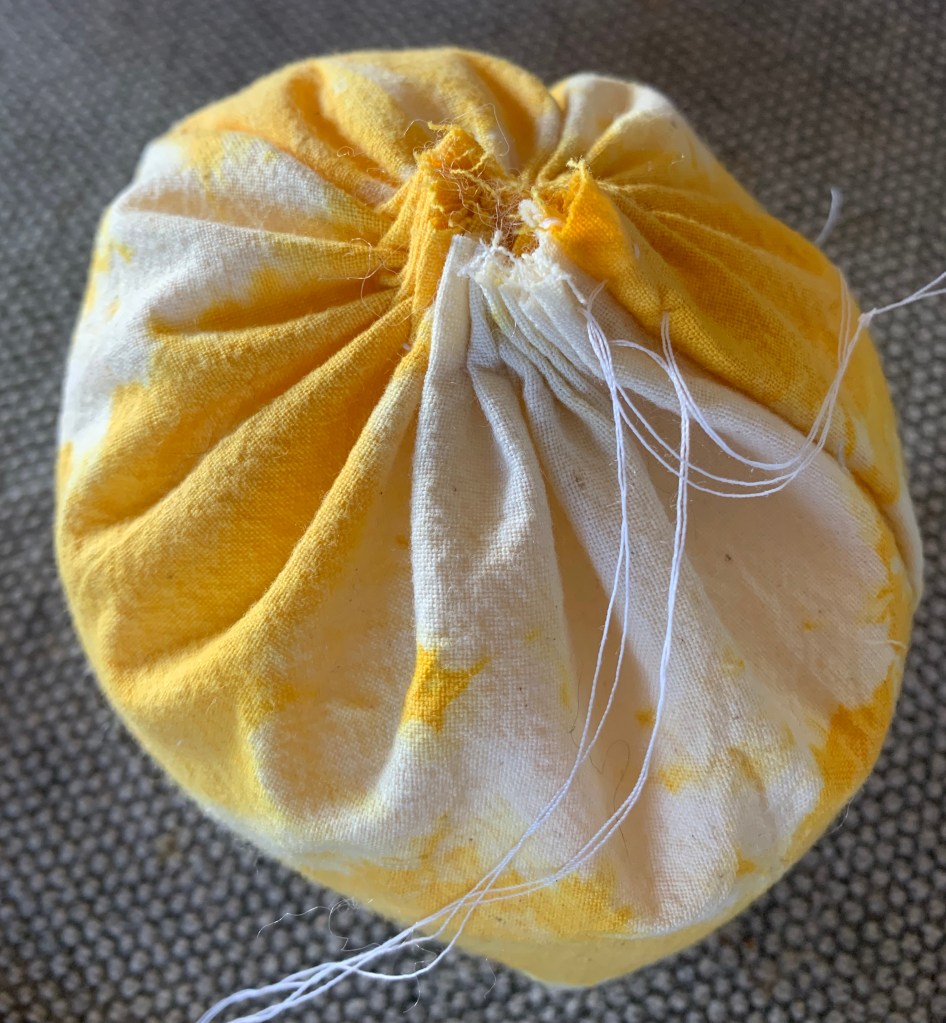
Now, do another 2 gathering stitches on the other end.

You can see in the picture below how for this side I started and stopped the gathering stitch around the already sewn edge seam. Do that. Much smoother.
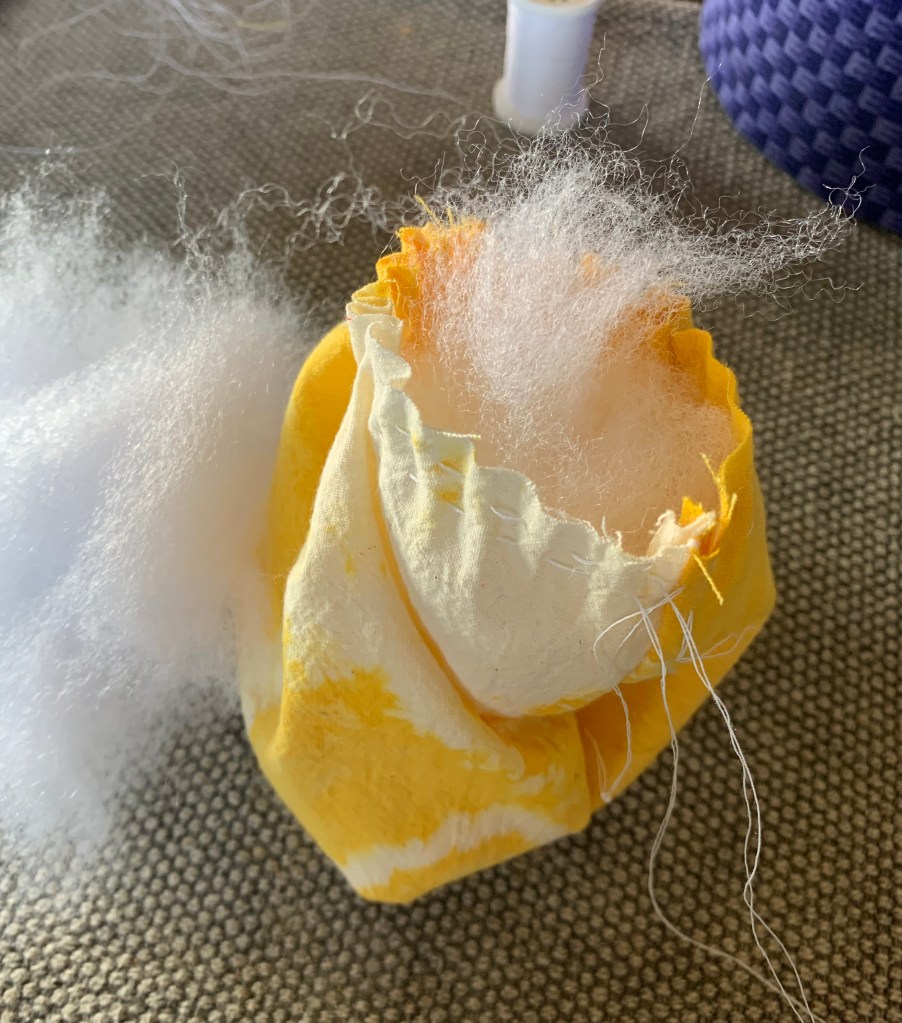
Now time to fill with fluff. I used a hypoallergenic fluff that I had left over from some sock monsters I’ve made in the past. Any fluff from a fabric/craft store will work fine. You could even stuff with crumbled up paper or torn up strips of fabric. Get wild. The point is just to make your pumpkin chonky. In hindsight I wish I would have added more fluff…so when in doubt add more! Fluff it up!
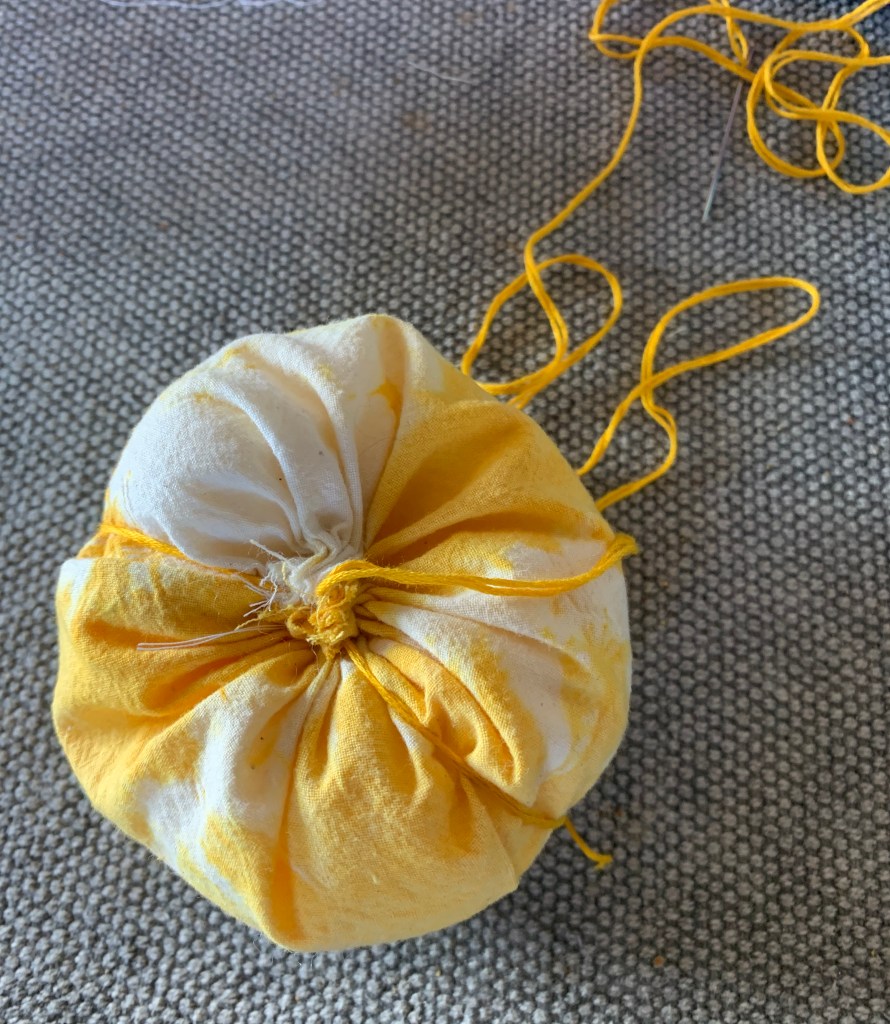
Now gently pull 2 strings on one side, tie off and sew through to keep it secure.
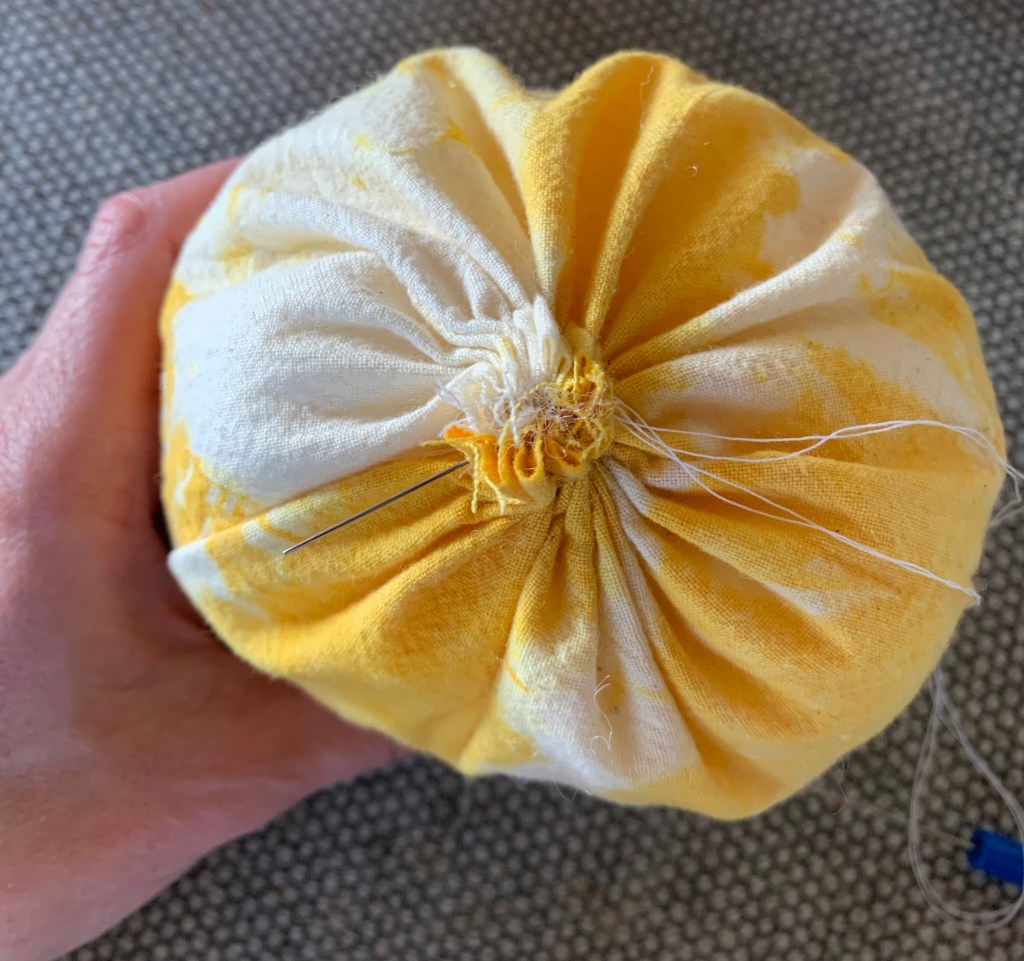
Ok, let’s give this pumpkin some shape. Take some embroidery thread. Whatever color works best with your fabric. I chose this rich yellowy, orange, marigold color. Beautiful. Thread a large needle and stick it up through the bottom of the pumpkin to pull through the top.


Bring the string over your pumpkin and push through the bottom out through the top again. Keep repeating this process until you reach your desired amount of pumpkin segments.

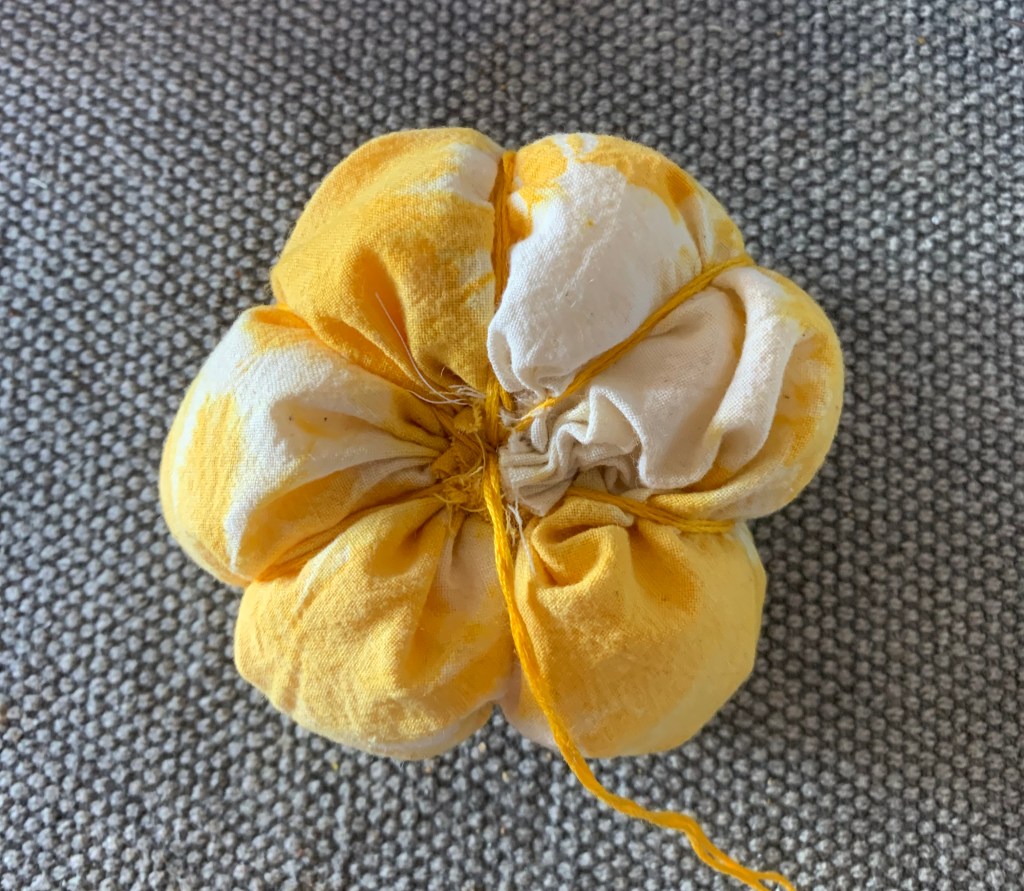
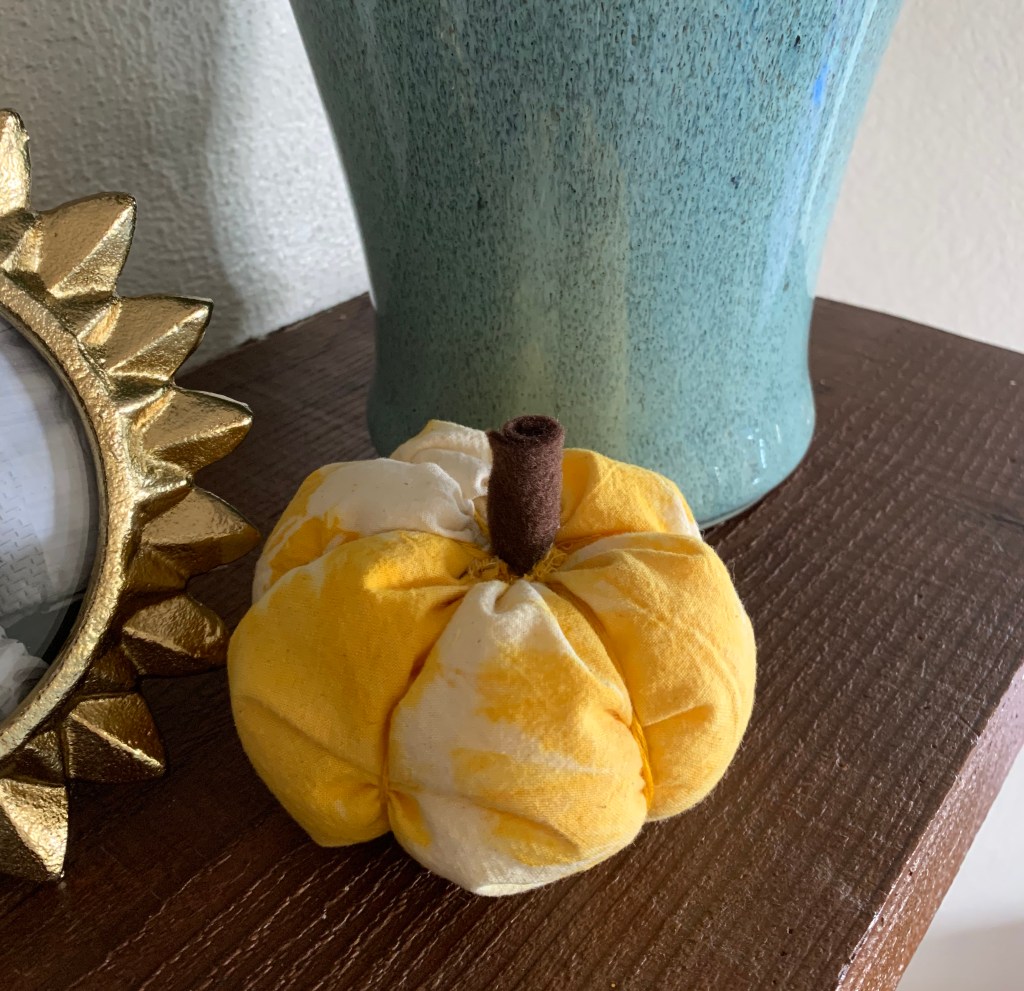
Ooooh we are getting closer. Adorbs. When you have your desired pumpkin segments (mine had 6) tie off your thread and cut the thread end.
Next cut a piece of felt. This will be your stem for your pumpkin. Mine was a bout 2 inches or maybe an inch and 1/2 long. I chose brown felt, I like how it complements the yellow nicely. Any color will work great.
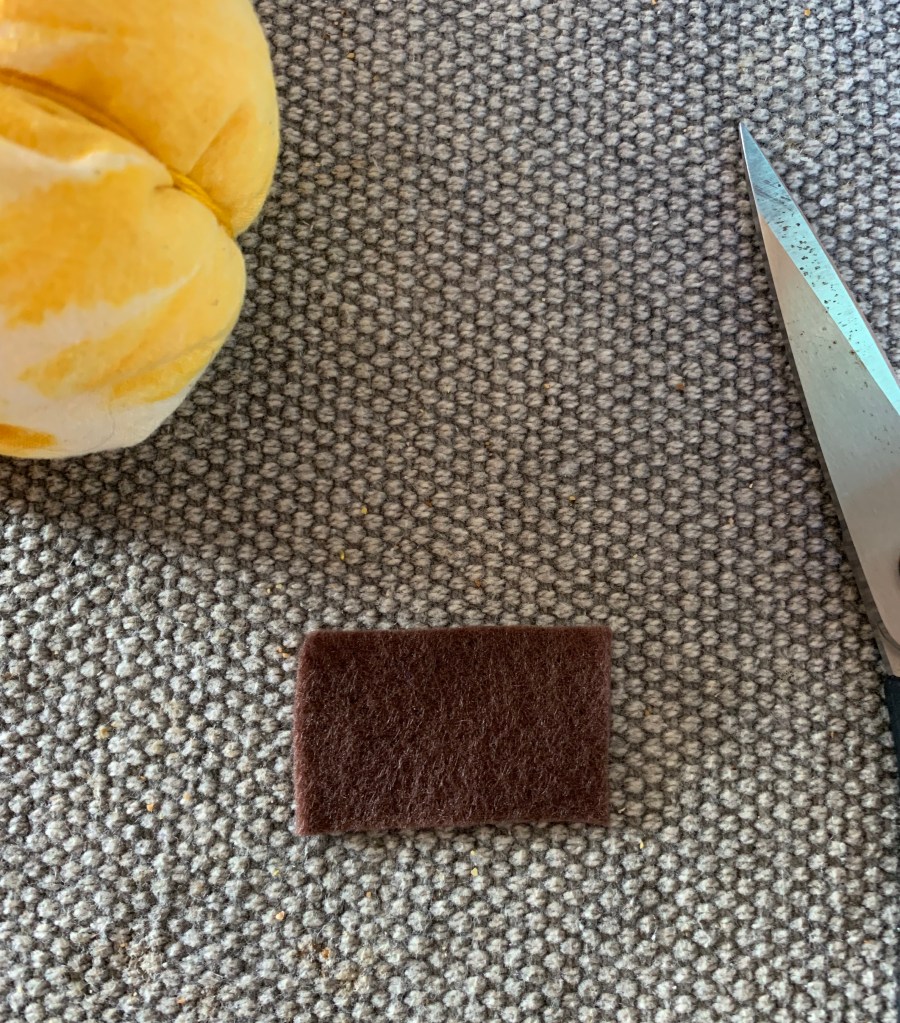
Get out your glue guns. Now roll up your piece of felt and squeeze some hot glue on one end and press to secure. You don’t need a glue gun you can also sew up your piece of rolled felt.

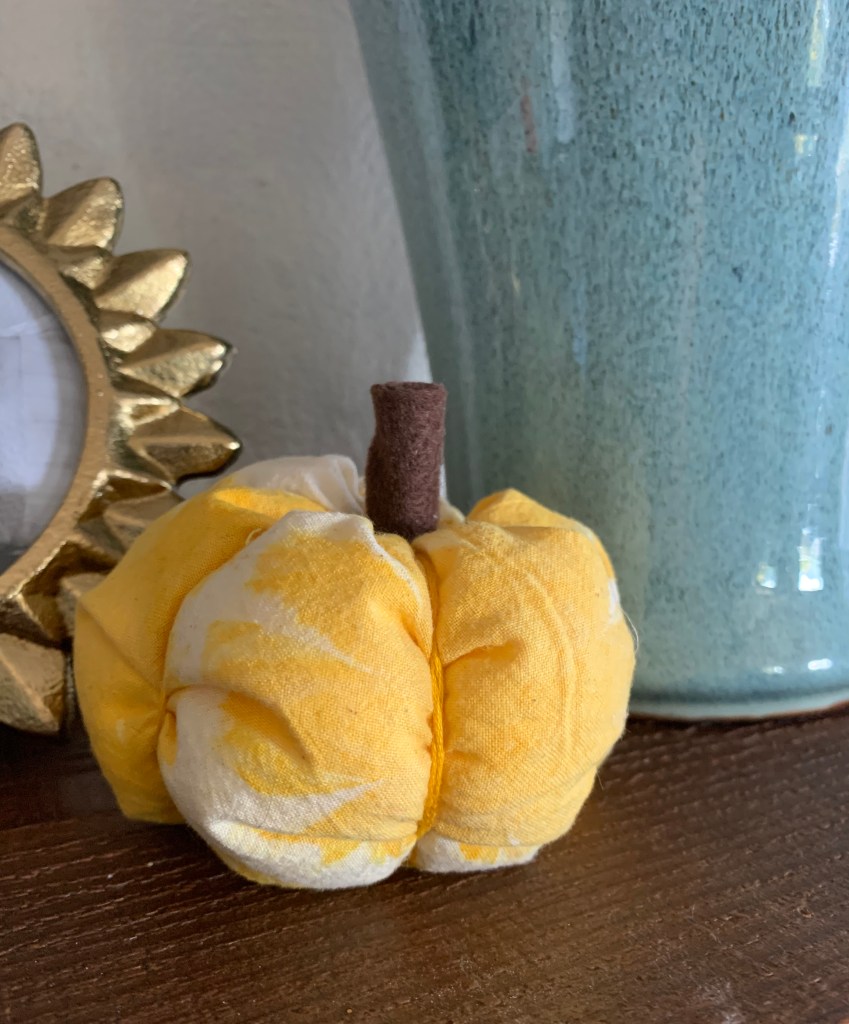
Squirt some more glue on the top of your pumpkin and push your stem into the glue. Or sew your rolled stem onto the top of the pumpkin.

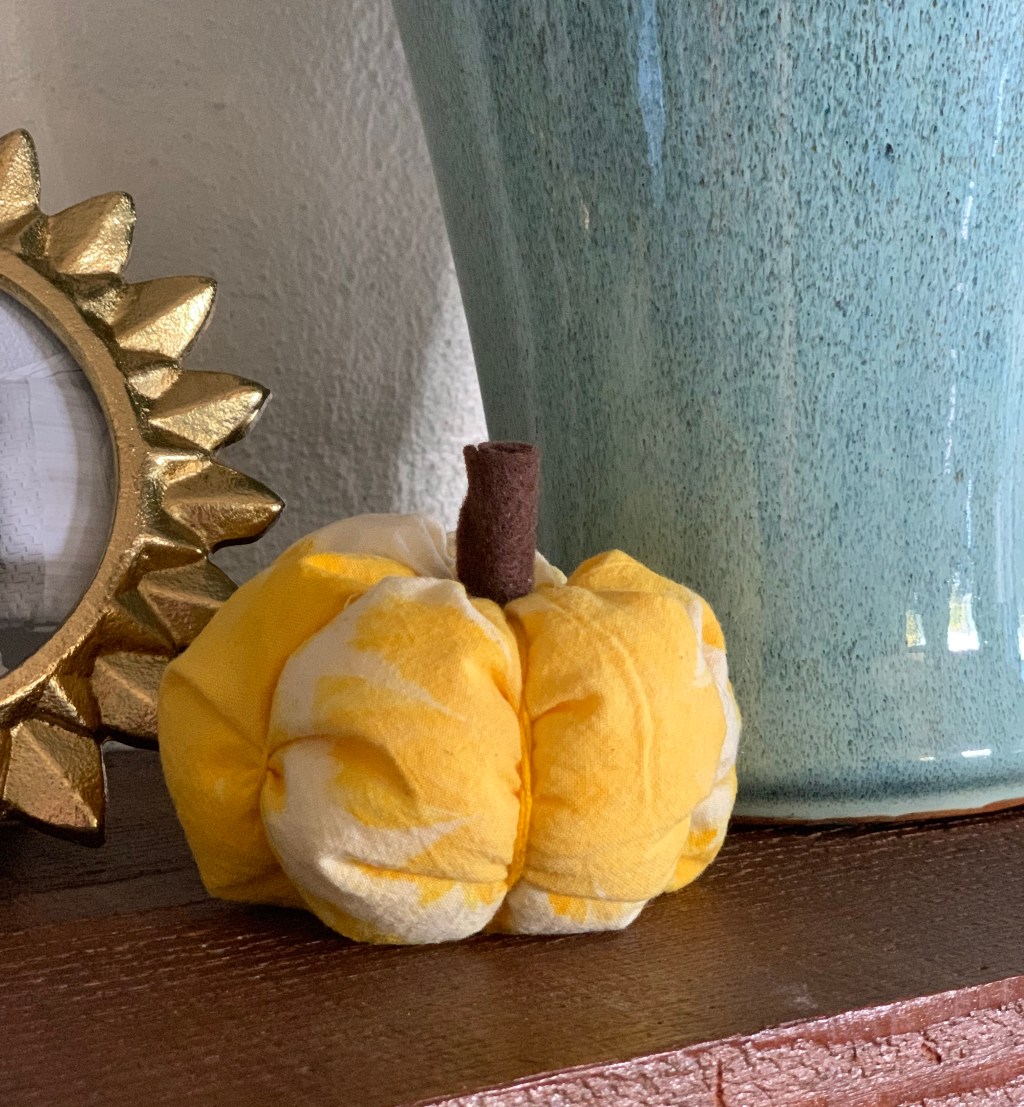
And voila! One adorbs, festive fabric pumpkin. Fun!

Let me know how yours turned out in the comments below.
Tag me @zeebrachild in your insta posts, I’d love to see your chonky pumpkins too.
*As an Amazon associate I earn from qualifying purchases.

Leave a comment